In Pulsonix PCB Design tool while creating footprints you can assign PIN number Automatically or manually but really really fast.
Steps for manually Pin numbering
Steps for manually Pin numbering
- Select " Renumber Pins" from "Utilities" menu
- And select your numbering from where you want. In this case ( according to below image ). I need to make changes from Pin number 4. So I just enter 4 and click OK.
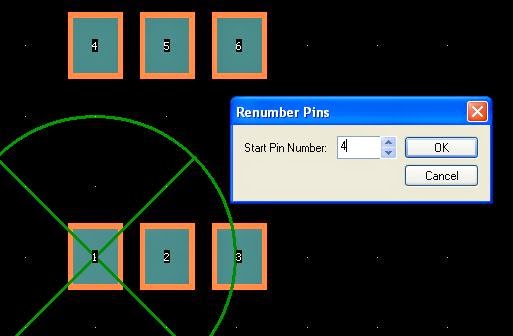
- Then I will click the right top Pad first and then will move further left and at last click any where in black window. And you are done.
Steps for Auto Pin numbering
- Select " Renumber Pins" from "Utilities" menu
- Then " Check by location "
- In sides you select both sides
- In Direction you select Left to right and bottom to top
- Your numbering are in reverse. So, here you select " Alternate Directions"
- Make sure you check for "reverse left - right on bottom side"

- Then Click OK
- A notepad will popup and will show you what changes has been done.
- Below image showing your Pin number as per datasheet.

No comments:
Post a Comment