Problem:-
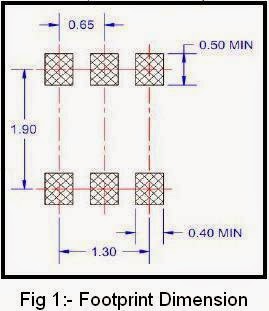
I have to creat a footprint as shown in Fig 1. But after creating ( see Fig 2 ) I got my Solder Mask connected. I would like to get clearance in between the Solder Mask. Please tell me solution for this. I am using Pulsonix PCB Design tool.

Solution:-
To fix this you need to make change in Technology file.
- Select " Technology " from "Setup" menu or press T key
- On your right side select Layer Classes
- Then click on " Solder Mask " > Edit
- Change the value in section " Pad Oversize" to 2 mil. Make sure you are working in "thou".

Exit from window by pressing OK. Your mask will change and will look like as shown below.
In Pulsonix you can change Pad numbering quick to learn that trick click here

No comments:
Post a Comment